Rod-Land: Rebuilding the Title Screen for the C64
I no longer remember exactly when my enthusiasm for Rod-Land started. I loved it in the early ’90s, because it was perhaps the first truly “Amiga-like” game I saw, where the huge sprites, exciting colors, and ridiculously good art direction all came together so well that it could blow everyone’s hair clean off.
Now, in 2026, I rolled up both sleeves and set out to make a faithful C64 animated image.
I never had an Amiga, so I only knew this game from magazines, meaning 576 Kilobyte, and from the few minutes I could catch here and there at my classmates’ homes. This kind of connection can be incredibly strong, because I have been thinking about this game ever since: how I could play it, and even more than that, what it might have been like on the Commodore 64.
The actual C64 port fell quite far behind the Amiga version visually, even though I was convinced the machine could have done more. Around Christmas 2021, I already took a shot at recreating one of the boss fight screens for the C64 in Photoshop, and I got quite far with it:
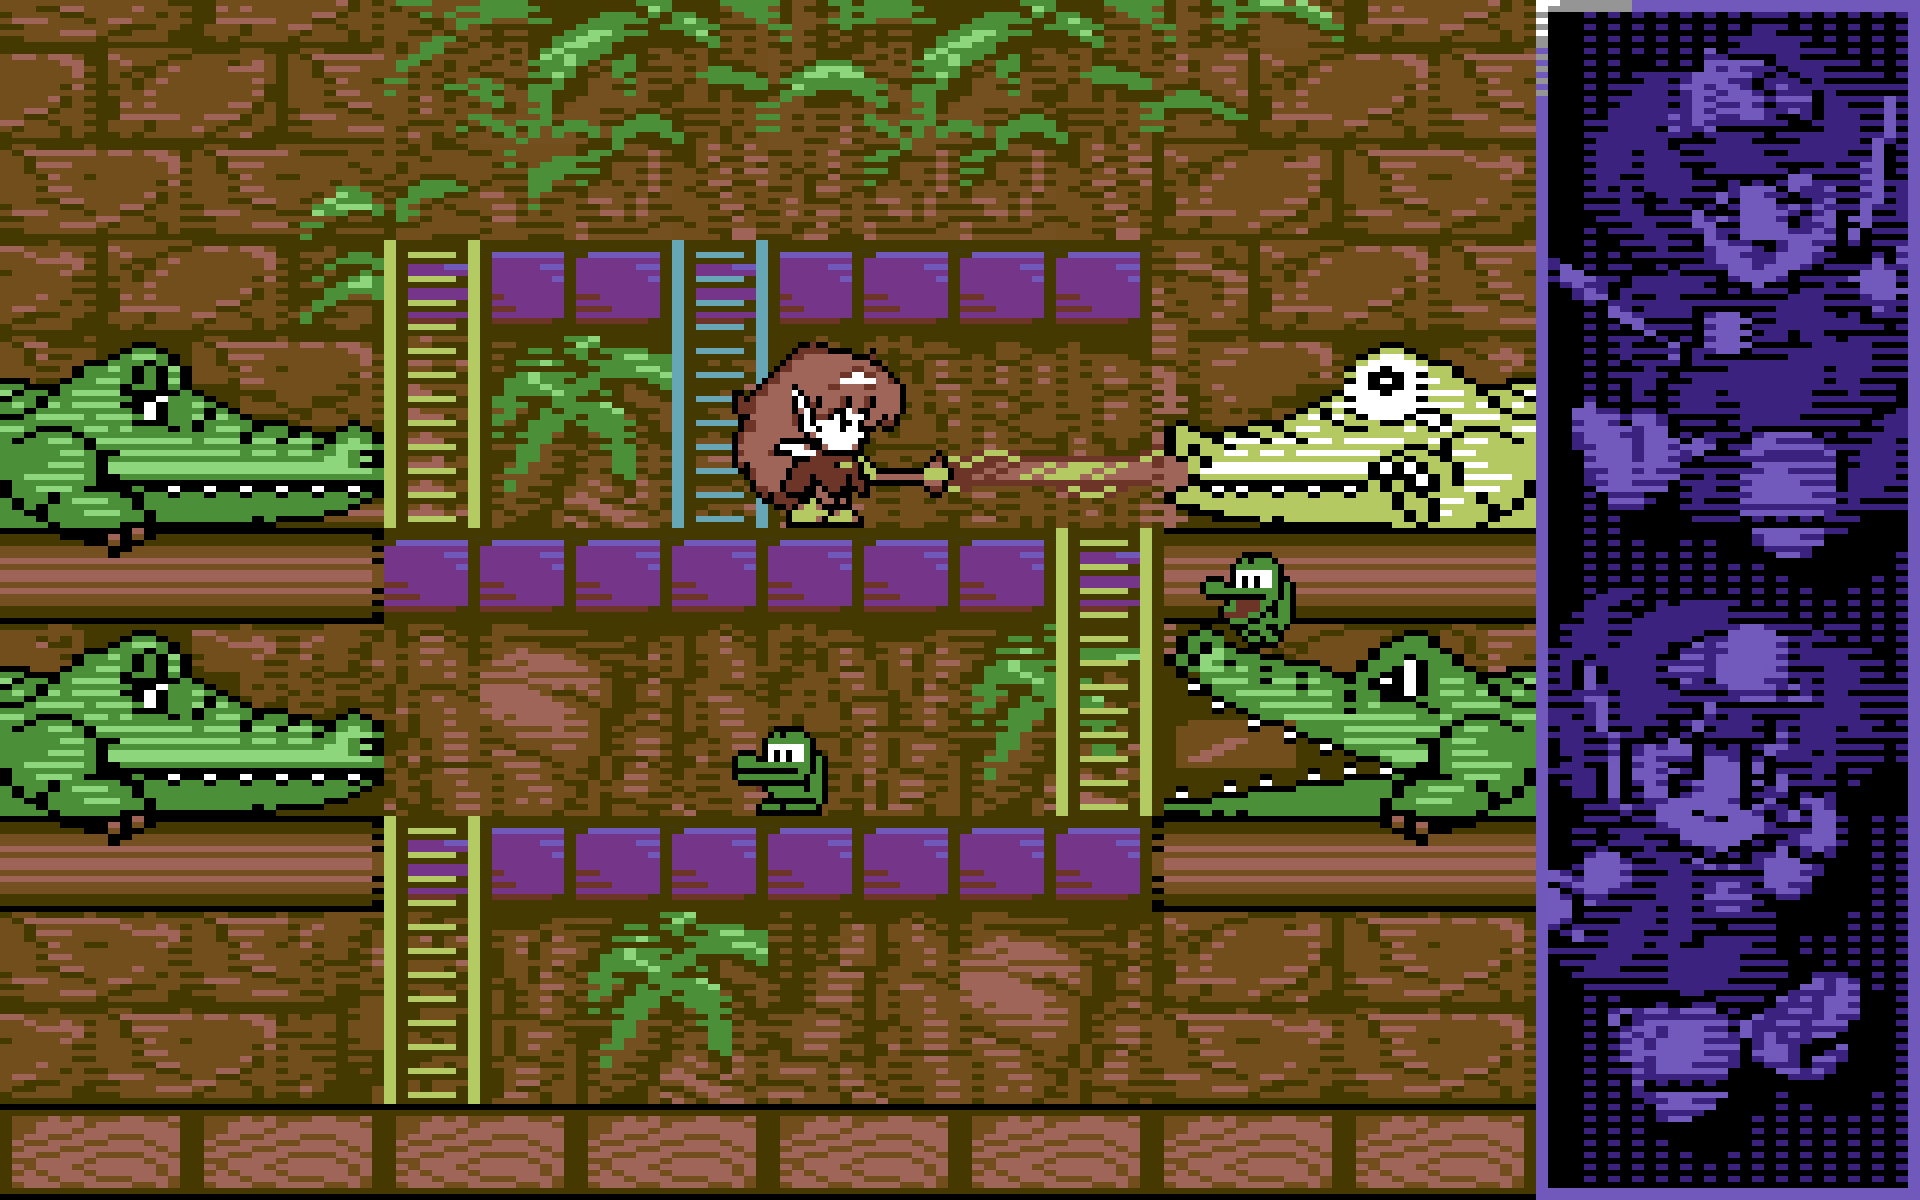
Working 4×8 cell by 4×8 cell, I painstakingly built the whole screen. I also managed to make the sprites by placing outlines over a multicolor base. I was very proud of the crocodiles’ eyes. I think I managed to capture each one’s character, even though the C64 gives you an absurdly small amount of room to express anything. I spent a lot of time fiddling with it before it came together. As a reminder, here are the originals:
Amiga and C64 originals
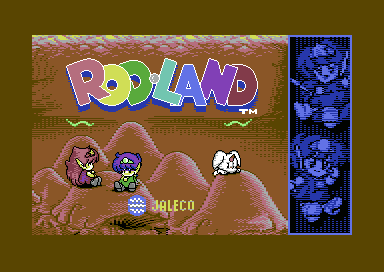
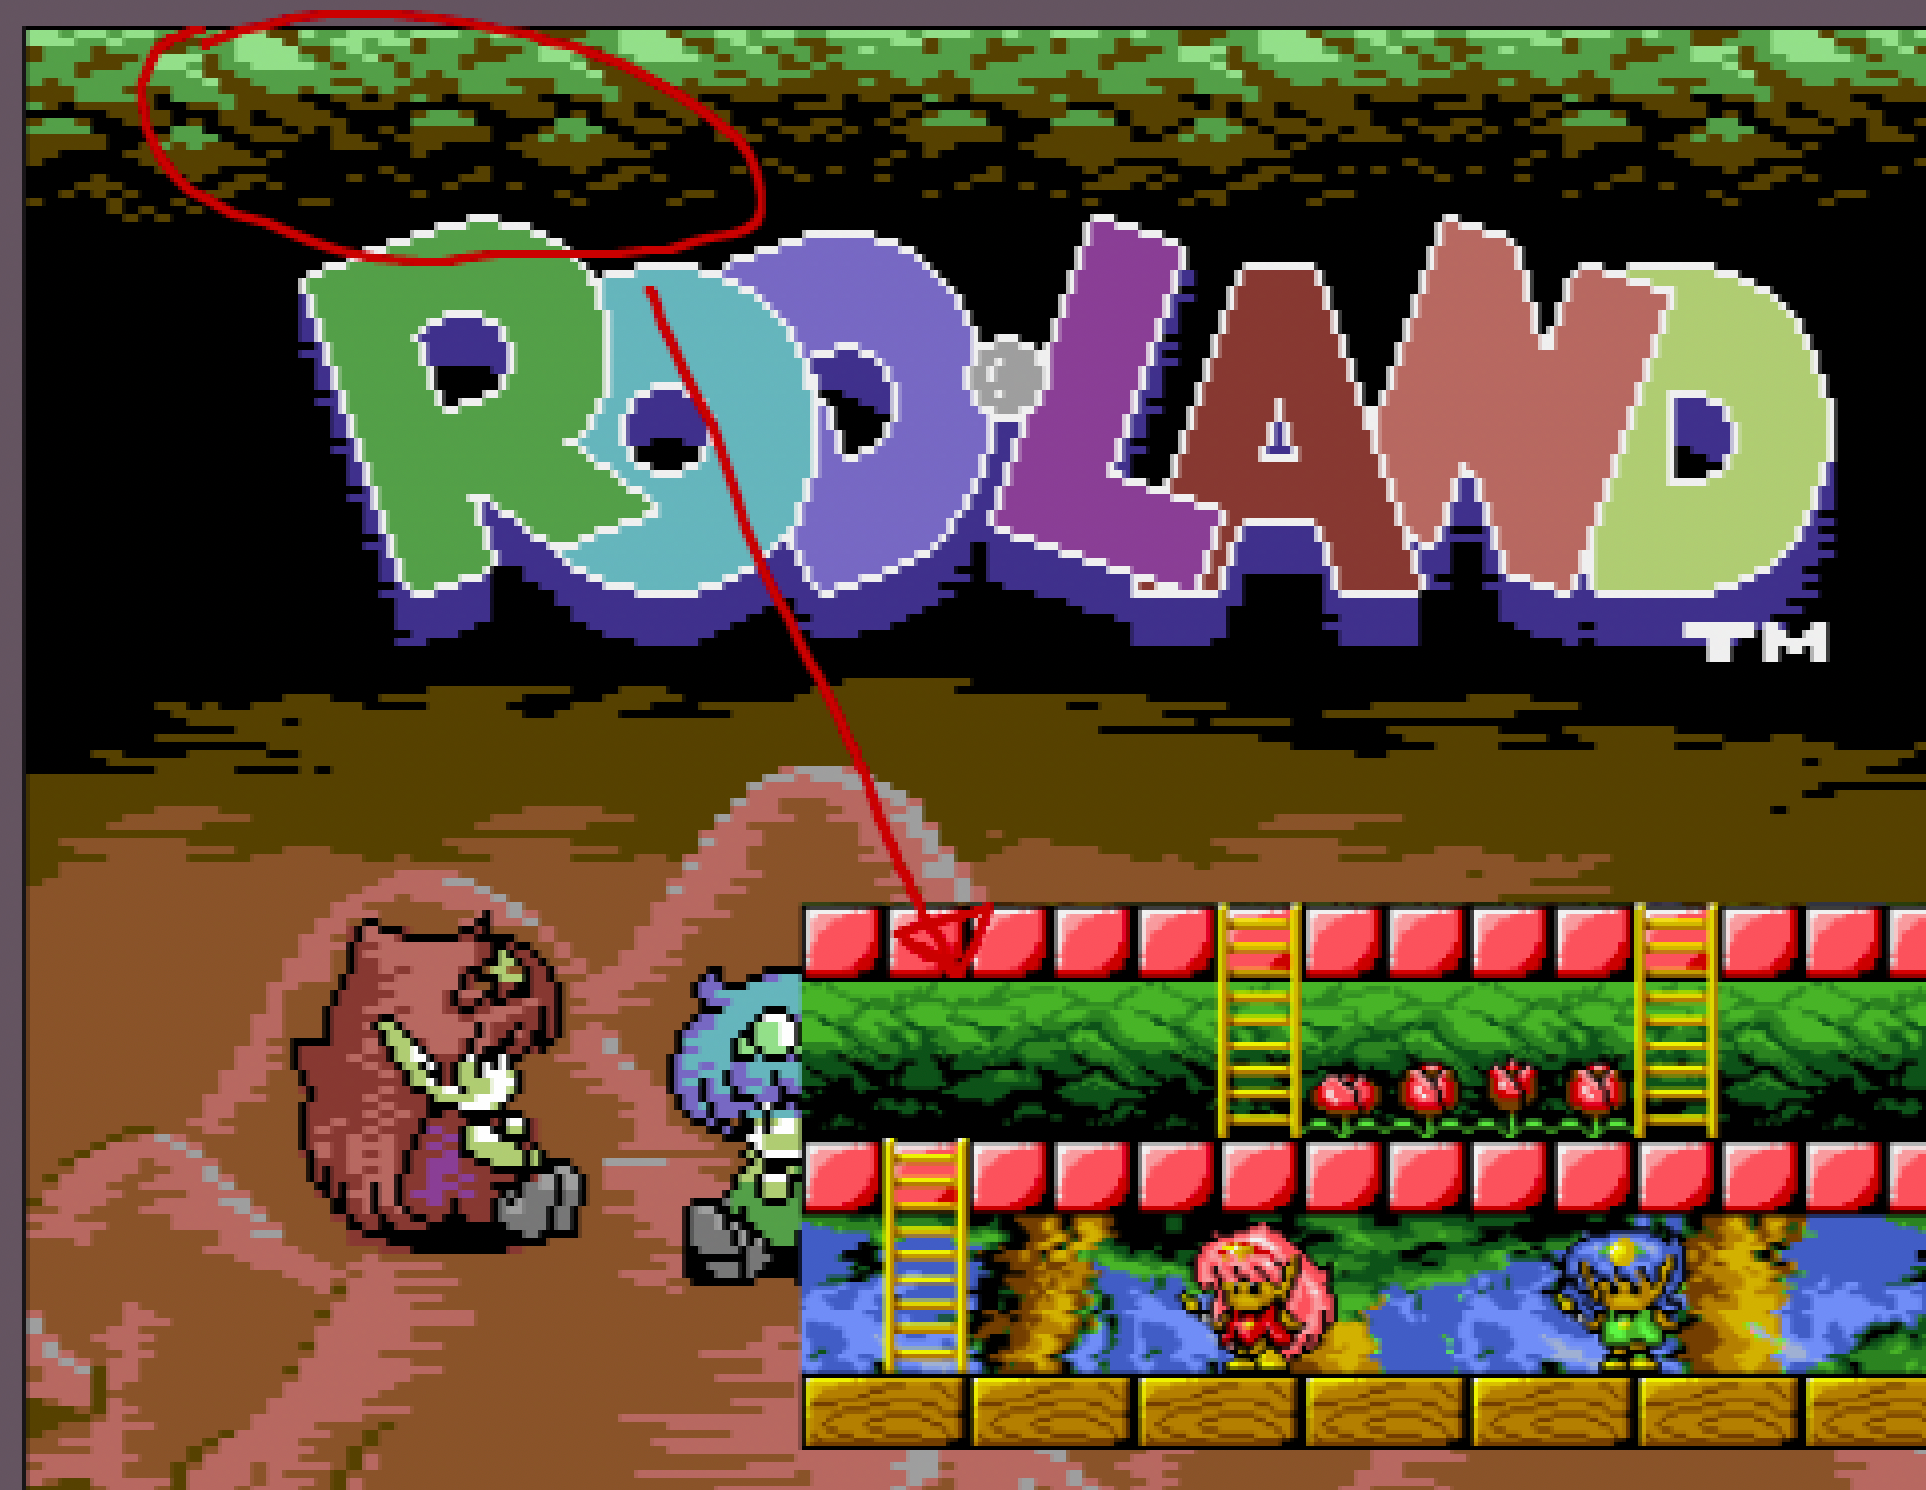
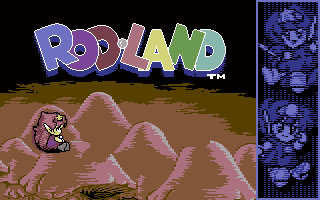
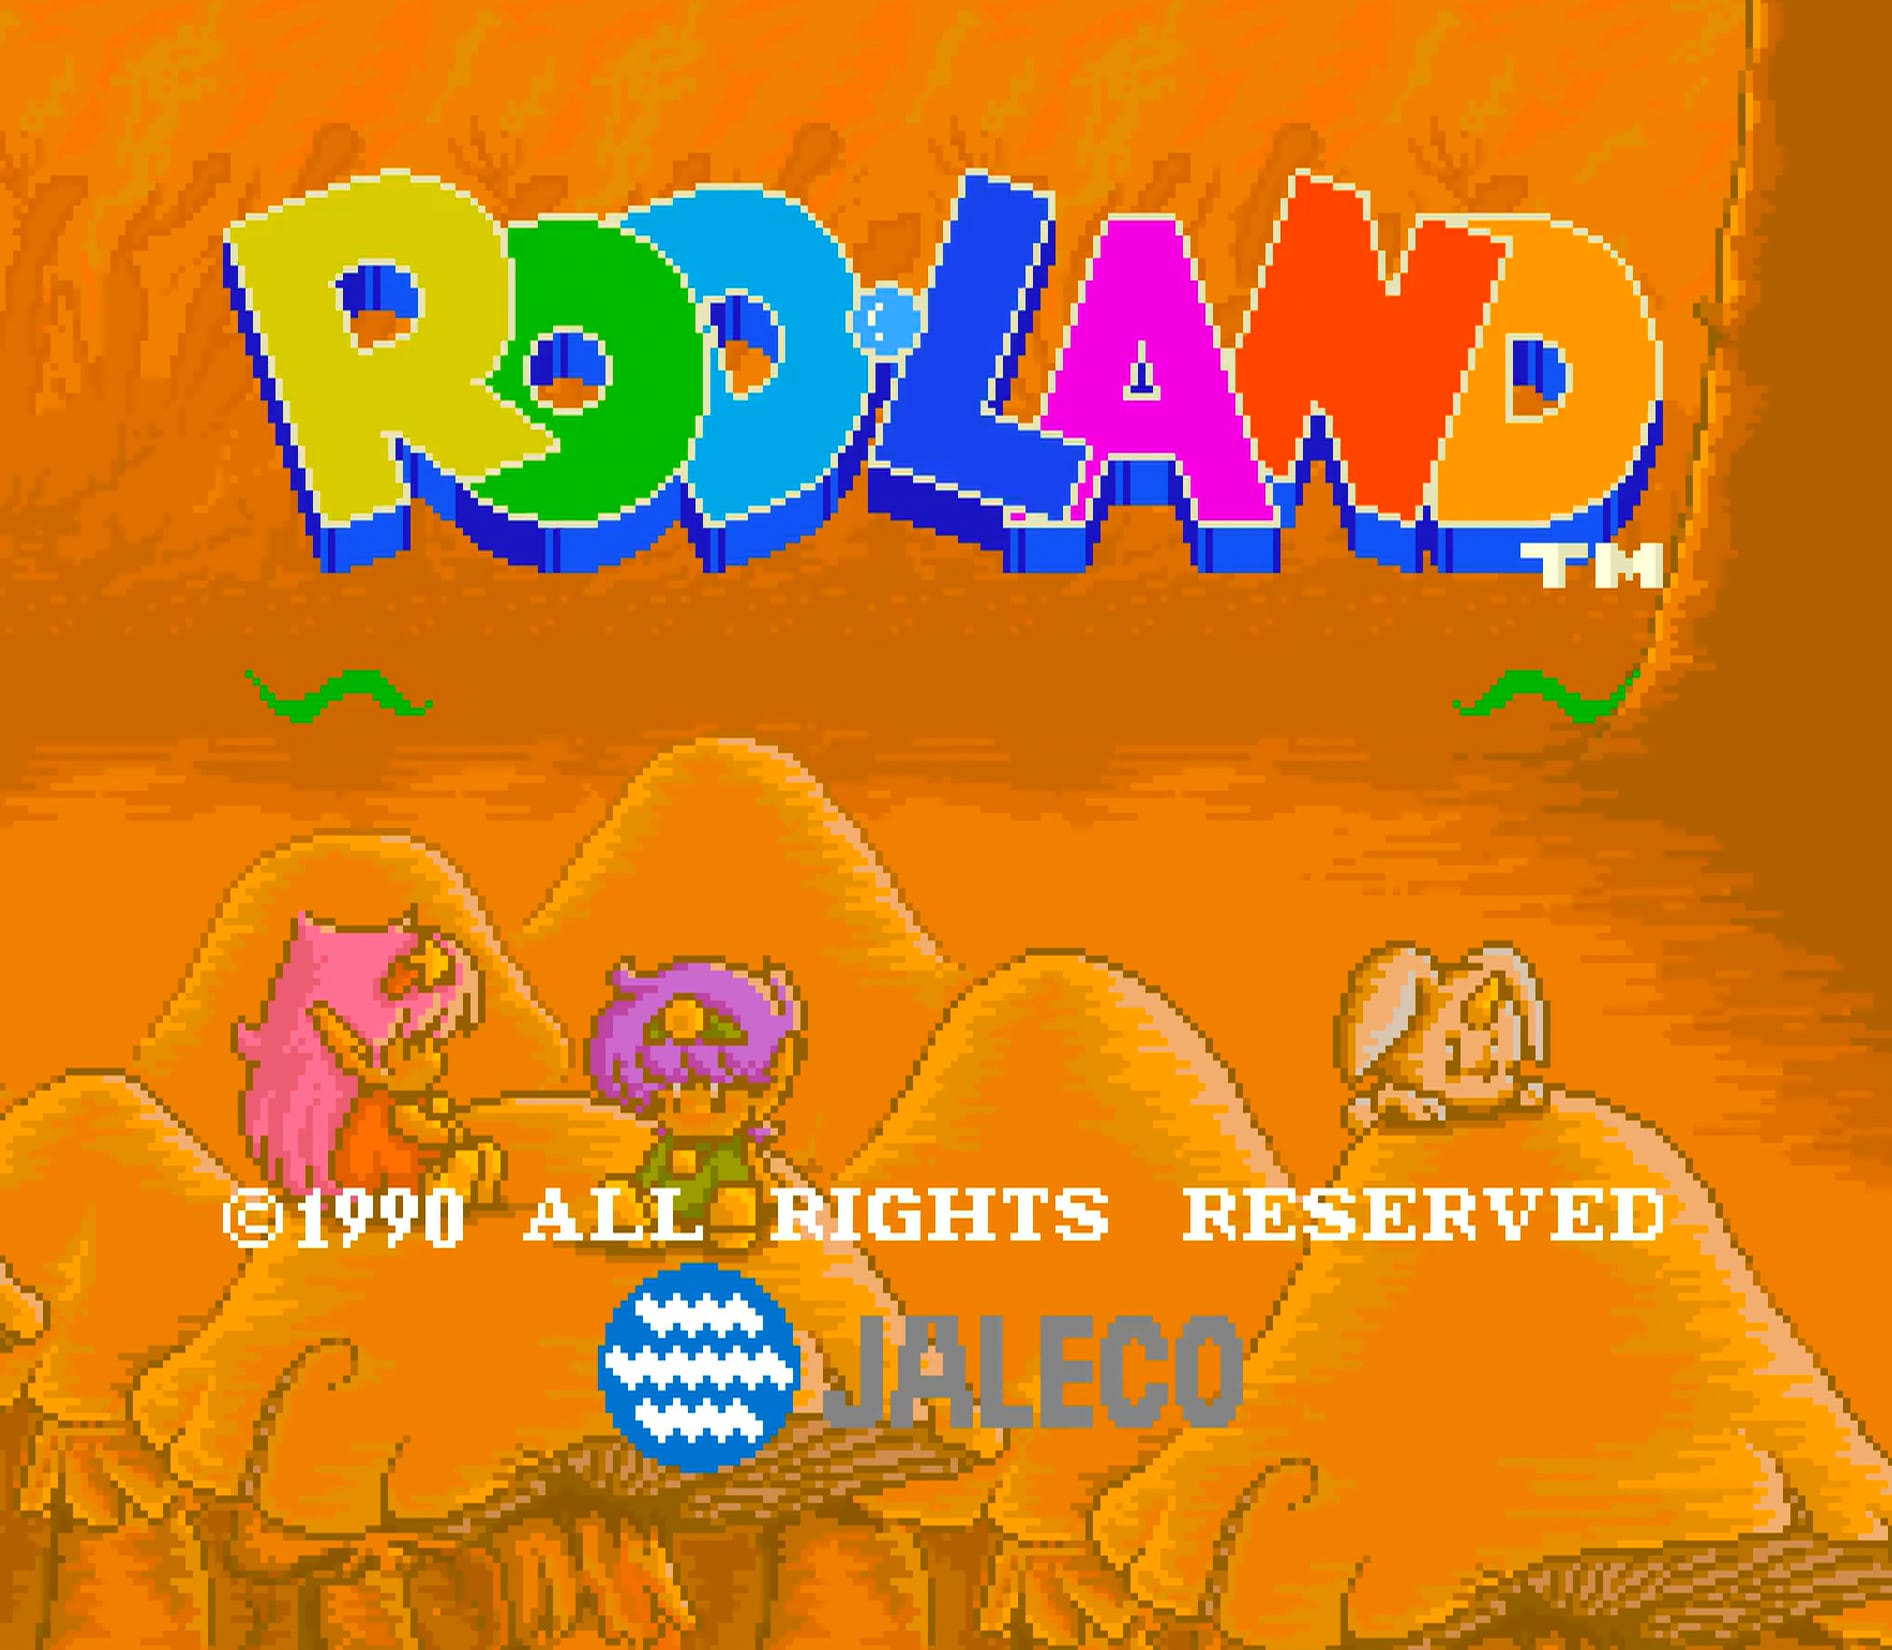
The gameplay is probably not feasible on the C64, but I kept thinking that I should take this further. Then, a few weeks ago, I started thinking that I should recreate the game’s title screen for the C64. The originals:
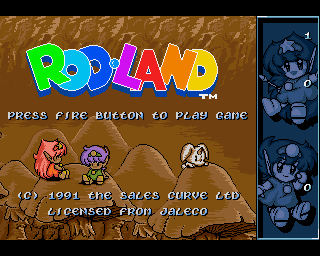
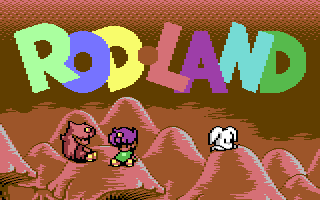
Amiga and C64 (original)
By now I no longer work in Photoshop, but in Aseprite. For this kind of pixel nerdery, it is the perfect tool. I love it. I honestly do not understand why I did not start using it sooner. I decided fairly quickly that I would follow the Amiga screen.
The first important realization was that, horizontally, the logo fits pixel-perfectly into eight 24×21 sprites, and in practice I would only need to display three multiplexed rows.
So the first problem to solve was how to display 3×8 sprites reliably. Displaying eight sprites is very easy. The problem starts when you need to start the next set. Waiting until the electron beam reaches the top of the next set and then quickly rewriting the sprite registers does not work. I tried. Everything flickers all over the place. There is already some amount of unpredictable jitter, and it can even happen that the VIC reads the graphics data from the wrong memory area, so the pixels appear differently than expected.
I learned from people more experienced than me that one way to speed this up is to use three screen RAMs and bake the sprite data pointers into the end of the screen RAM at assembly time. By chip design, that is where they live, so these writes can be skipped. The sprite X positions are identical, so we save those too. Only the Y positions need to be updated on the raster line. There are just enough clock cycles for that.
In the end, through trial and error, I also had to figure out that I needed to pad the timing-sensitive code with nop instructions just to be in the right place at the right time. Eventually, it worked.
I was so happy I wanted to sacrifice a goat.
The next thing was the color animation, which was also present in the arcade and Amiga versions, but missing from the C64 version. My idea here was to use the global background color for the dark blue under the logo, keep the Color RAM color for the actual background color, in this case black, and drive the characters from Screen RAM. Screen RAM, because it can represent two arbitrary colors, and with a single byte write I can update exactly what I need.
I measured the animation: it consists of seven steps, and I prepared all seven phases nicely in Aseprite. I store these and, at runtime, basically write the appropriate row of bytes into Screen RAM. Unfortunately, I have to do this three times, because the multiplexer switches between screens. That means 150 bytes per screen, so 450 byte writes in total, which eats up pretty much all the remaining CPU time. Not very conservative, but I did not care, because this is just a simple graphic.
The next task was the manga characters. My plan was that both characters would get three sprites each, and the little white “dog” would get two. But then the question was: what kind of sprite, with what kind of graphics data?
My first idea was to use a hires sprite for the ear and face details, which gives 24×21 pixels, and place a multicolor graphics layer underneath. Then I would put one XY-expanded multicolor sprite in the background, and one XY-expanded hires sprite offset by 1 px over it, also in the background. This way I could fiddle out an almost 1-pixel high-resolution outline.
I think I spent about 20 hours on this alone, working on it in the evenings. I got it working, but it was a massive pain. For one thing, I did not even understand at first that in multicolor graphics mode, each 4×8 cell can only have two foreground colors. The rest are background. Debugging this and finally realizing what was going on took ages:
I had to write little tests like this to figure out what I did not understand. Here the multicolor XY-expanded sprite runs underneath the multicolor layer, and you can see that I had configured certain tiles incorrectly.
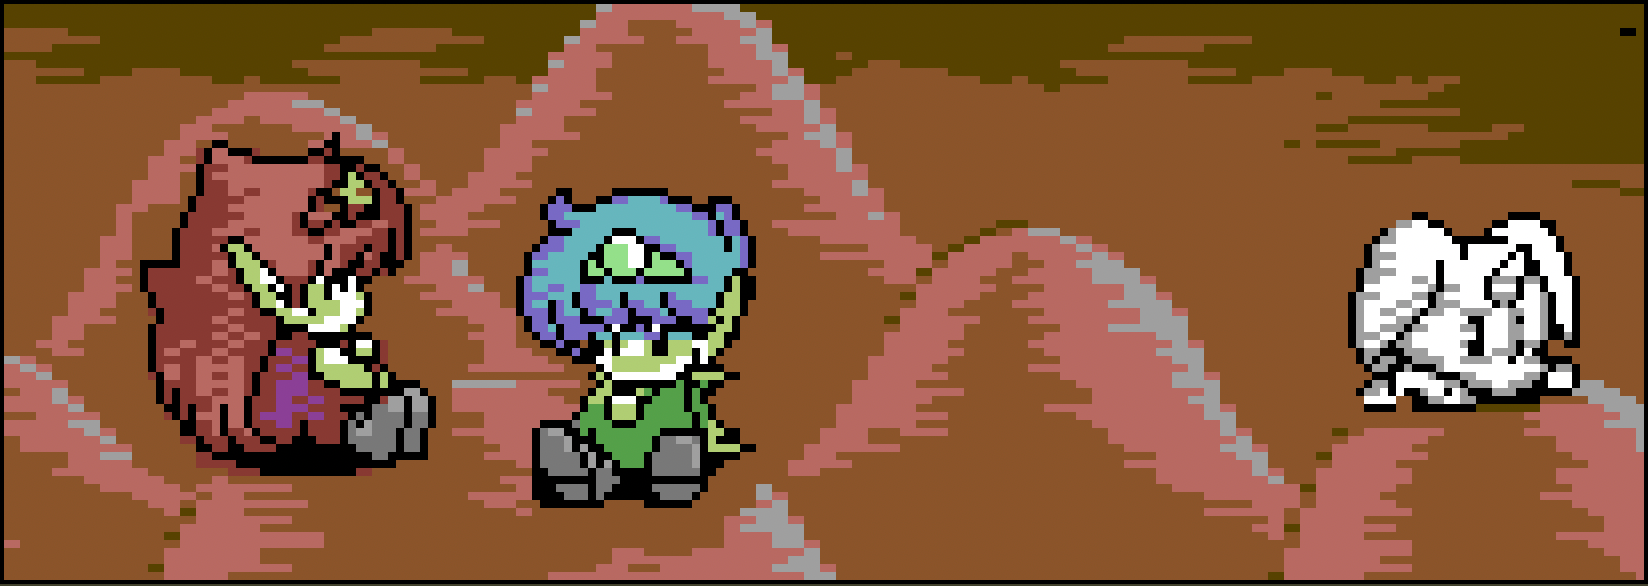
By the time I got it working, I was roughly here:
The character is pretty good, but I could not solve the shoe area properly, and there are some ugly bits on the left side too. Eventually I realized that the whole approach with those background XY-expanded multi and hires sprites was wrong. It is enough to cover the outlines with three normal hires sprites, and the remaining colors can simply be put together cell by cell with the multicolor colors.
Back to Aseprite, and redraw everything from scratch.
At this point, I had actually finished all three characters. I was lucky, because for the little red-haired character, I managed to make the hair on the left side with a Y-expanded hires sprite, and I could complete the horizontal pixels with the appropriate multicolor pixels:
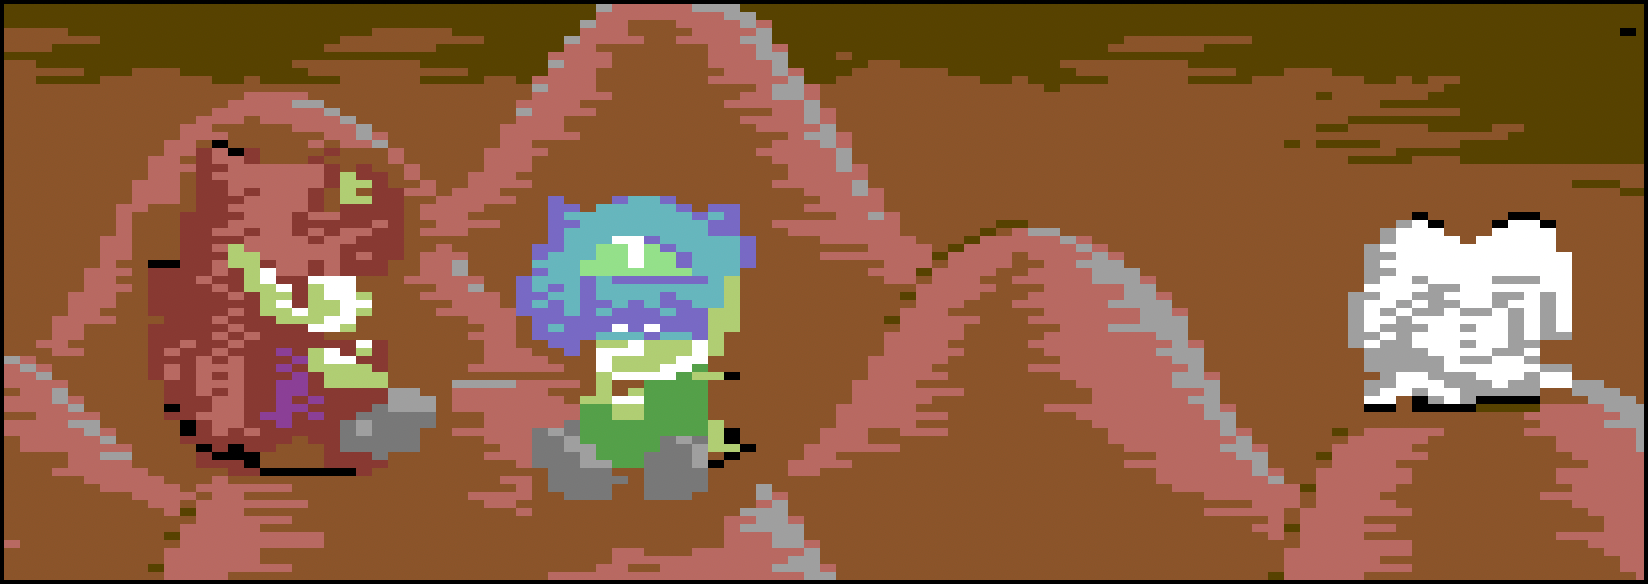
And here it is without the outline sprites, as produced by the multicolor image only:
I can also show how the sprites cover each other:
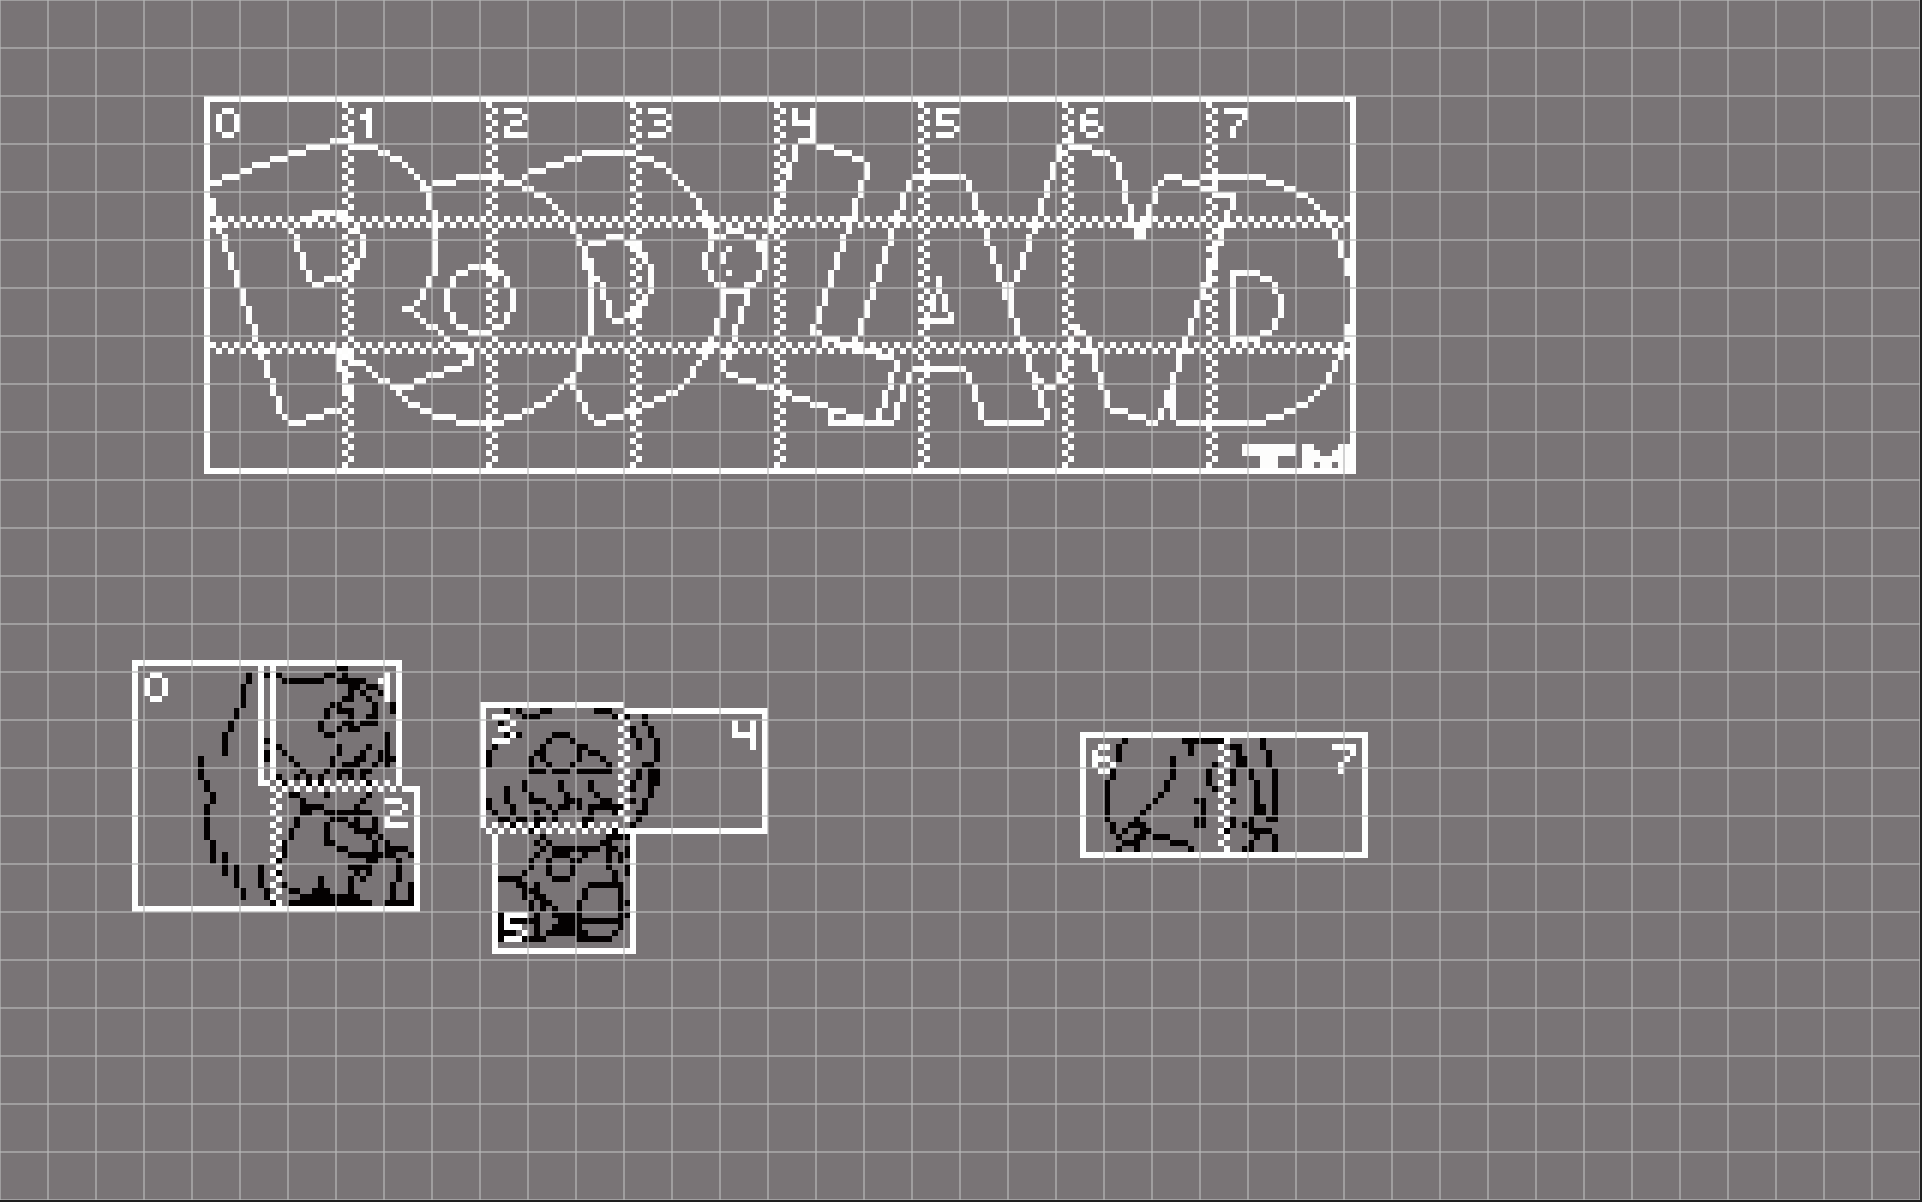
Of course, the image is from the C64 Graphics Explorer app. 😄
I do not regret spending a bunch of time and energy on the wrong sprite technique at the beginning, because the final result more than makes up for it. The 16-bit graphic is almost perfectly identical to this.
I also brought over the green leaves at the top of the screen, which I drew from the first level of the Amiga game:
Further improvements
Looking at the progress at this point, the center felt surprisingly dark, cold, and alien. Reworking it caused a few problems: dark blue had been my background color so far, but now I needed to make it brown. The upside was that this suddenly gave me a new color I could use globally.
I started putting the dark brown back into the outlines of the mushrooms, then recolored the green leaves at the top of the image. After that I drew in the tree on the right side based on the arcade original, along with the dark brown gradient under the logo. I spent quite a lot of time fiddling with that before I found a solution I liked. But even that was not enough, because the brown color let me fix a lot of tiny pixels on the characters. In the end, I also started redrawing the mushrooms so they would better capture the richer colors of the original.
I repositioned the mushrooms and characters so they matched the original one to one, drew in the two green leaves from the arcade version, which for some reason were left out of the Amiga version, and also drew in the JALECO logo of the original Japanese developer, which only appears in the arcade version. That one is done in multicolor. The hair color of the middle character changed too.
Many pixel errors lined my path. It turned out my Aseprite workflow was not perfect: I draw 160×200 pixels inside a 320×200 canvas, so I have to be very careful where I place them, and I made plenty of mistakes along the way. Note: because of the sprite layer, I work in a mixed mode. I had to fix all of these by hand: take a screenshot in VICE, import it back, compare it, see where I messed up, fix it, export again, and so on. I had a few versions:
Looking at the process, it is easy to see how much work goes into something that looks like nothing. By the end, I even had to place the sprites again by hand. And because of three problematic pixels in the logo’s color animation, I had to fix all seven phases of that too. Oh, and the letters were on seven separate layers for each animation phase. Then export everything again.
Until the nosebleeds.
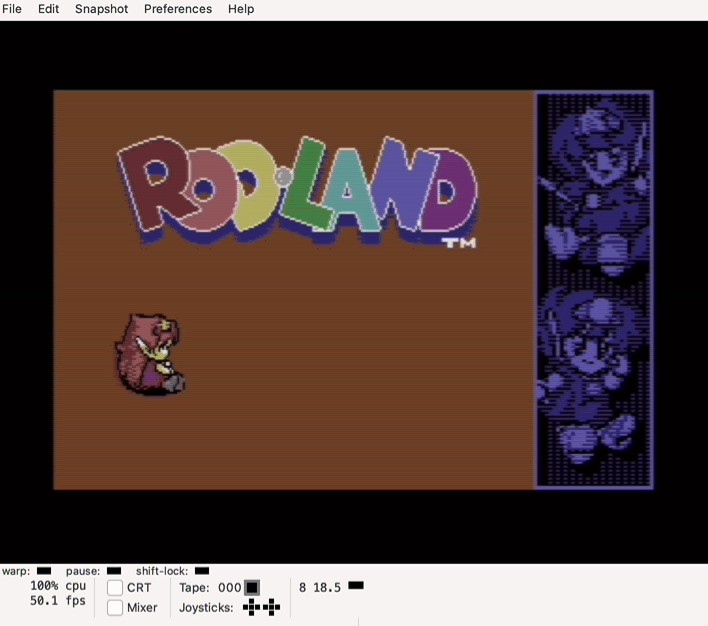
But a tissue stops the nosebleed, and now it feels as if Rod-Land had always had a faithful title screen on the Commodore 64, right alongside the arcade and Amiga 500 ports:
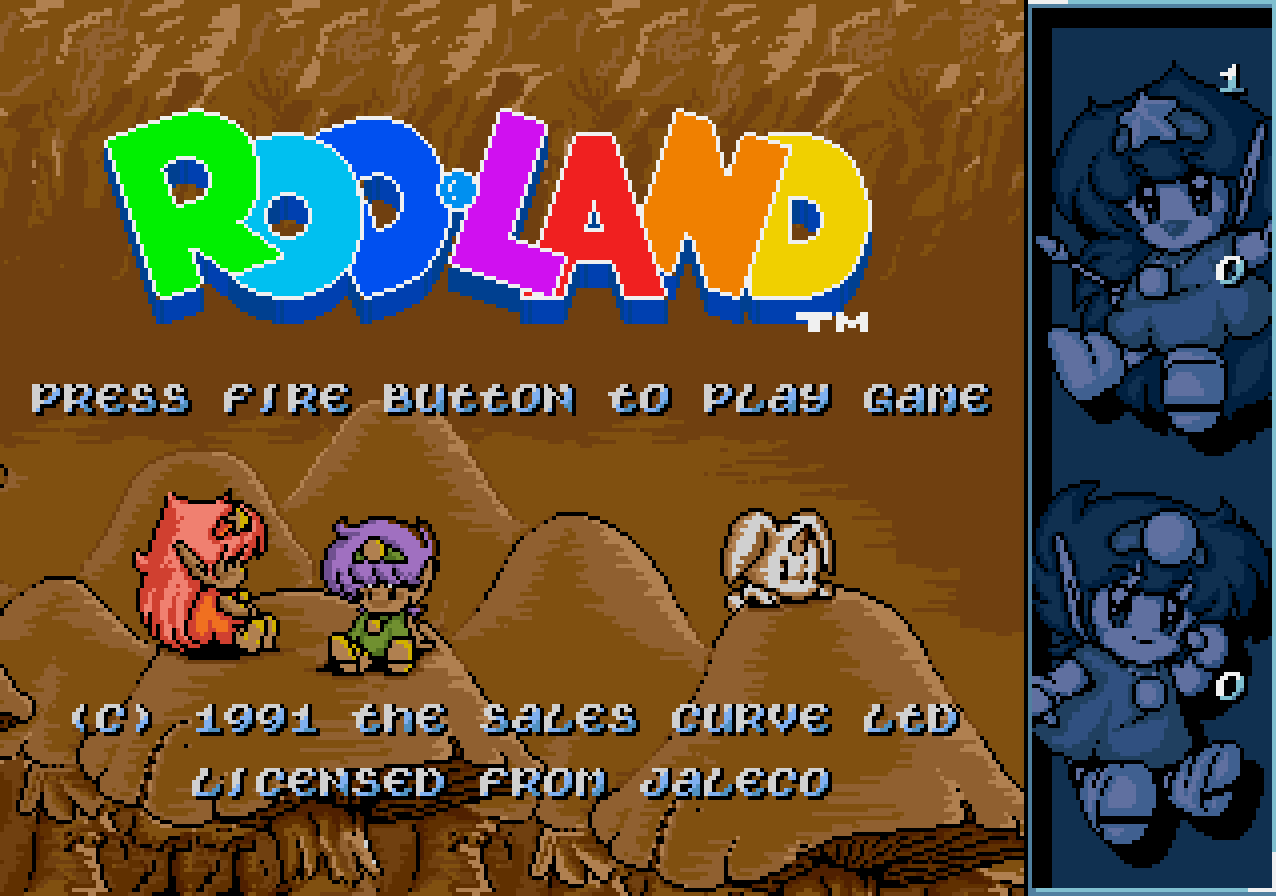

Arcade, Amiga, Commodore 64 (mine)
If you would like to explore all of this layer by layer, even with a CRT filter, download or update C64 Graphics Explorer. The scene release page for the graphic is here, where you can also download the PRG file itself and run it in an emulator, because that is where it really comes alive: